Frame Assembly | 2 Door Installation | 3 Door Installation | 4 Door Installation | Screen Installation
 Frame Assembly & Installation Instructions
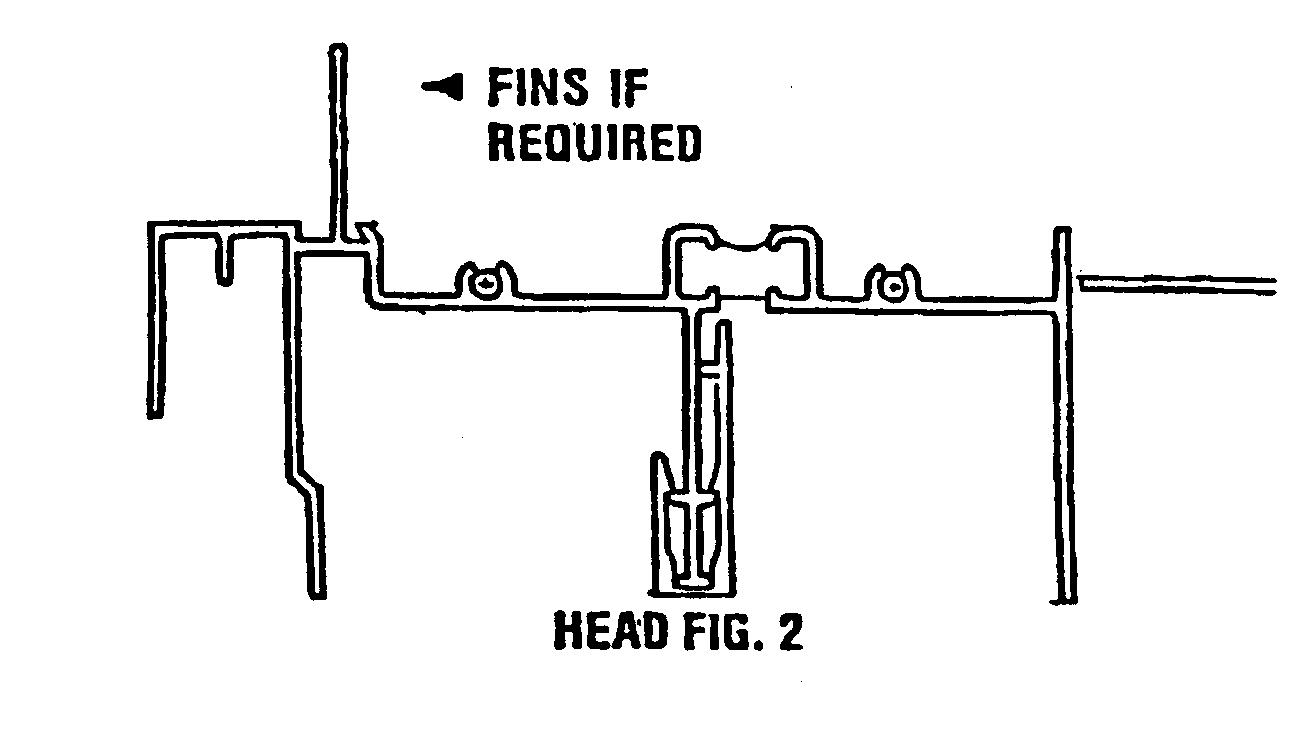
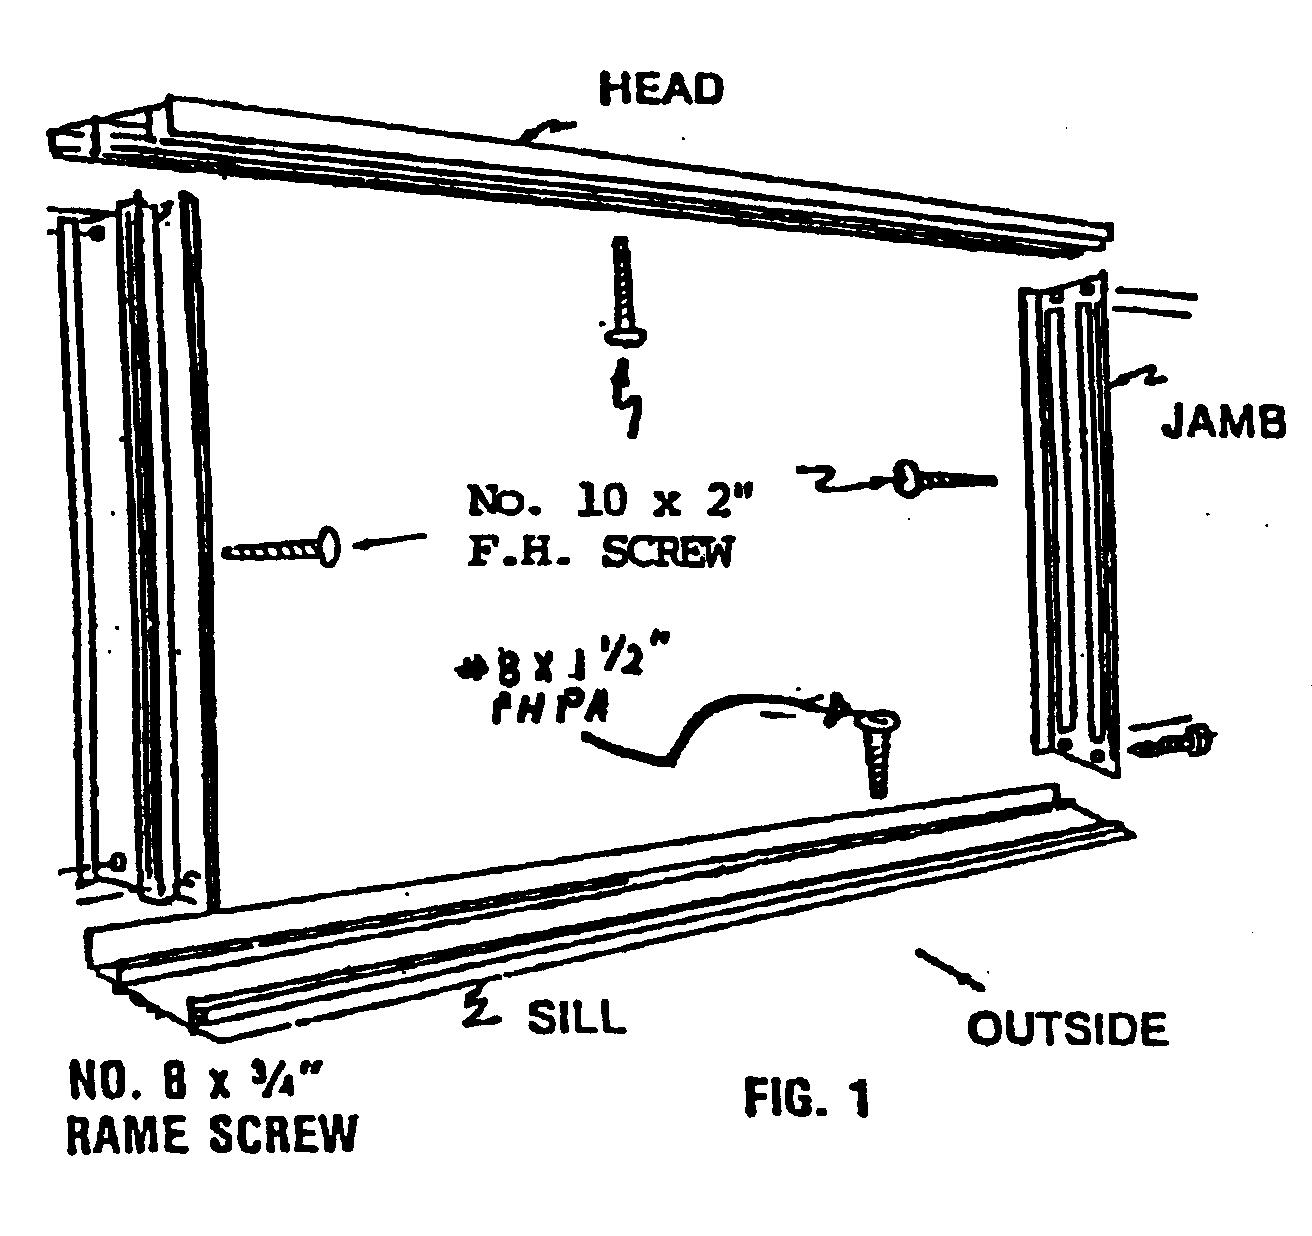
- Assemble master frame using No. 8 x ¾” screws supplied. See figure 1,2,3, & 4 to determine proper assembly of parts.
- After the frame has been assembled, caulk under the still and under installation screw holes (Fig. 4) and in the corners of the frame where jamb meets still in each of the installation holes. Also caulk outside of jamb and head where they join the outside wall and to exterior edge of sill at sub-floor.
 Install master frame into rough opening. Shim at installation screw to prevent buckling of the frame and to square up frame plumb and true. Use No. 10 x 2″ screws in head, sill, and jambs.
- If wood buck is supplied, it must be installed square, plumbed and leveled in the rough opening. Be sure to thoroughly caulk between the bottom and sides of the wood sill and the sub floor, and use flashing as required.
Panels are reversible – simply place active panel (X) left or right as desired with the interlock facing outside.
IMPORTANT: Before installation check squareness of panels by measuring each one diagonally. They may be squared up by hitting corners with a hammer using a block of wood to protect aluminum frame.
Panels may be installed from inside or outside. Make sure wheels in moving panel are retracted.
To install from inside:
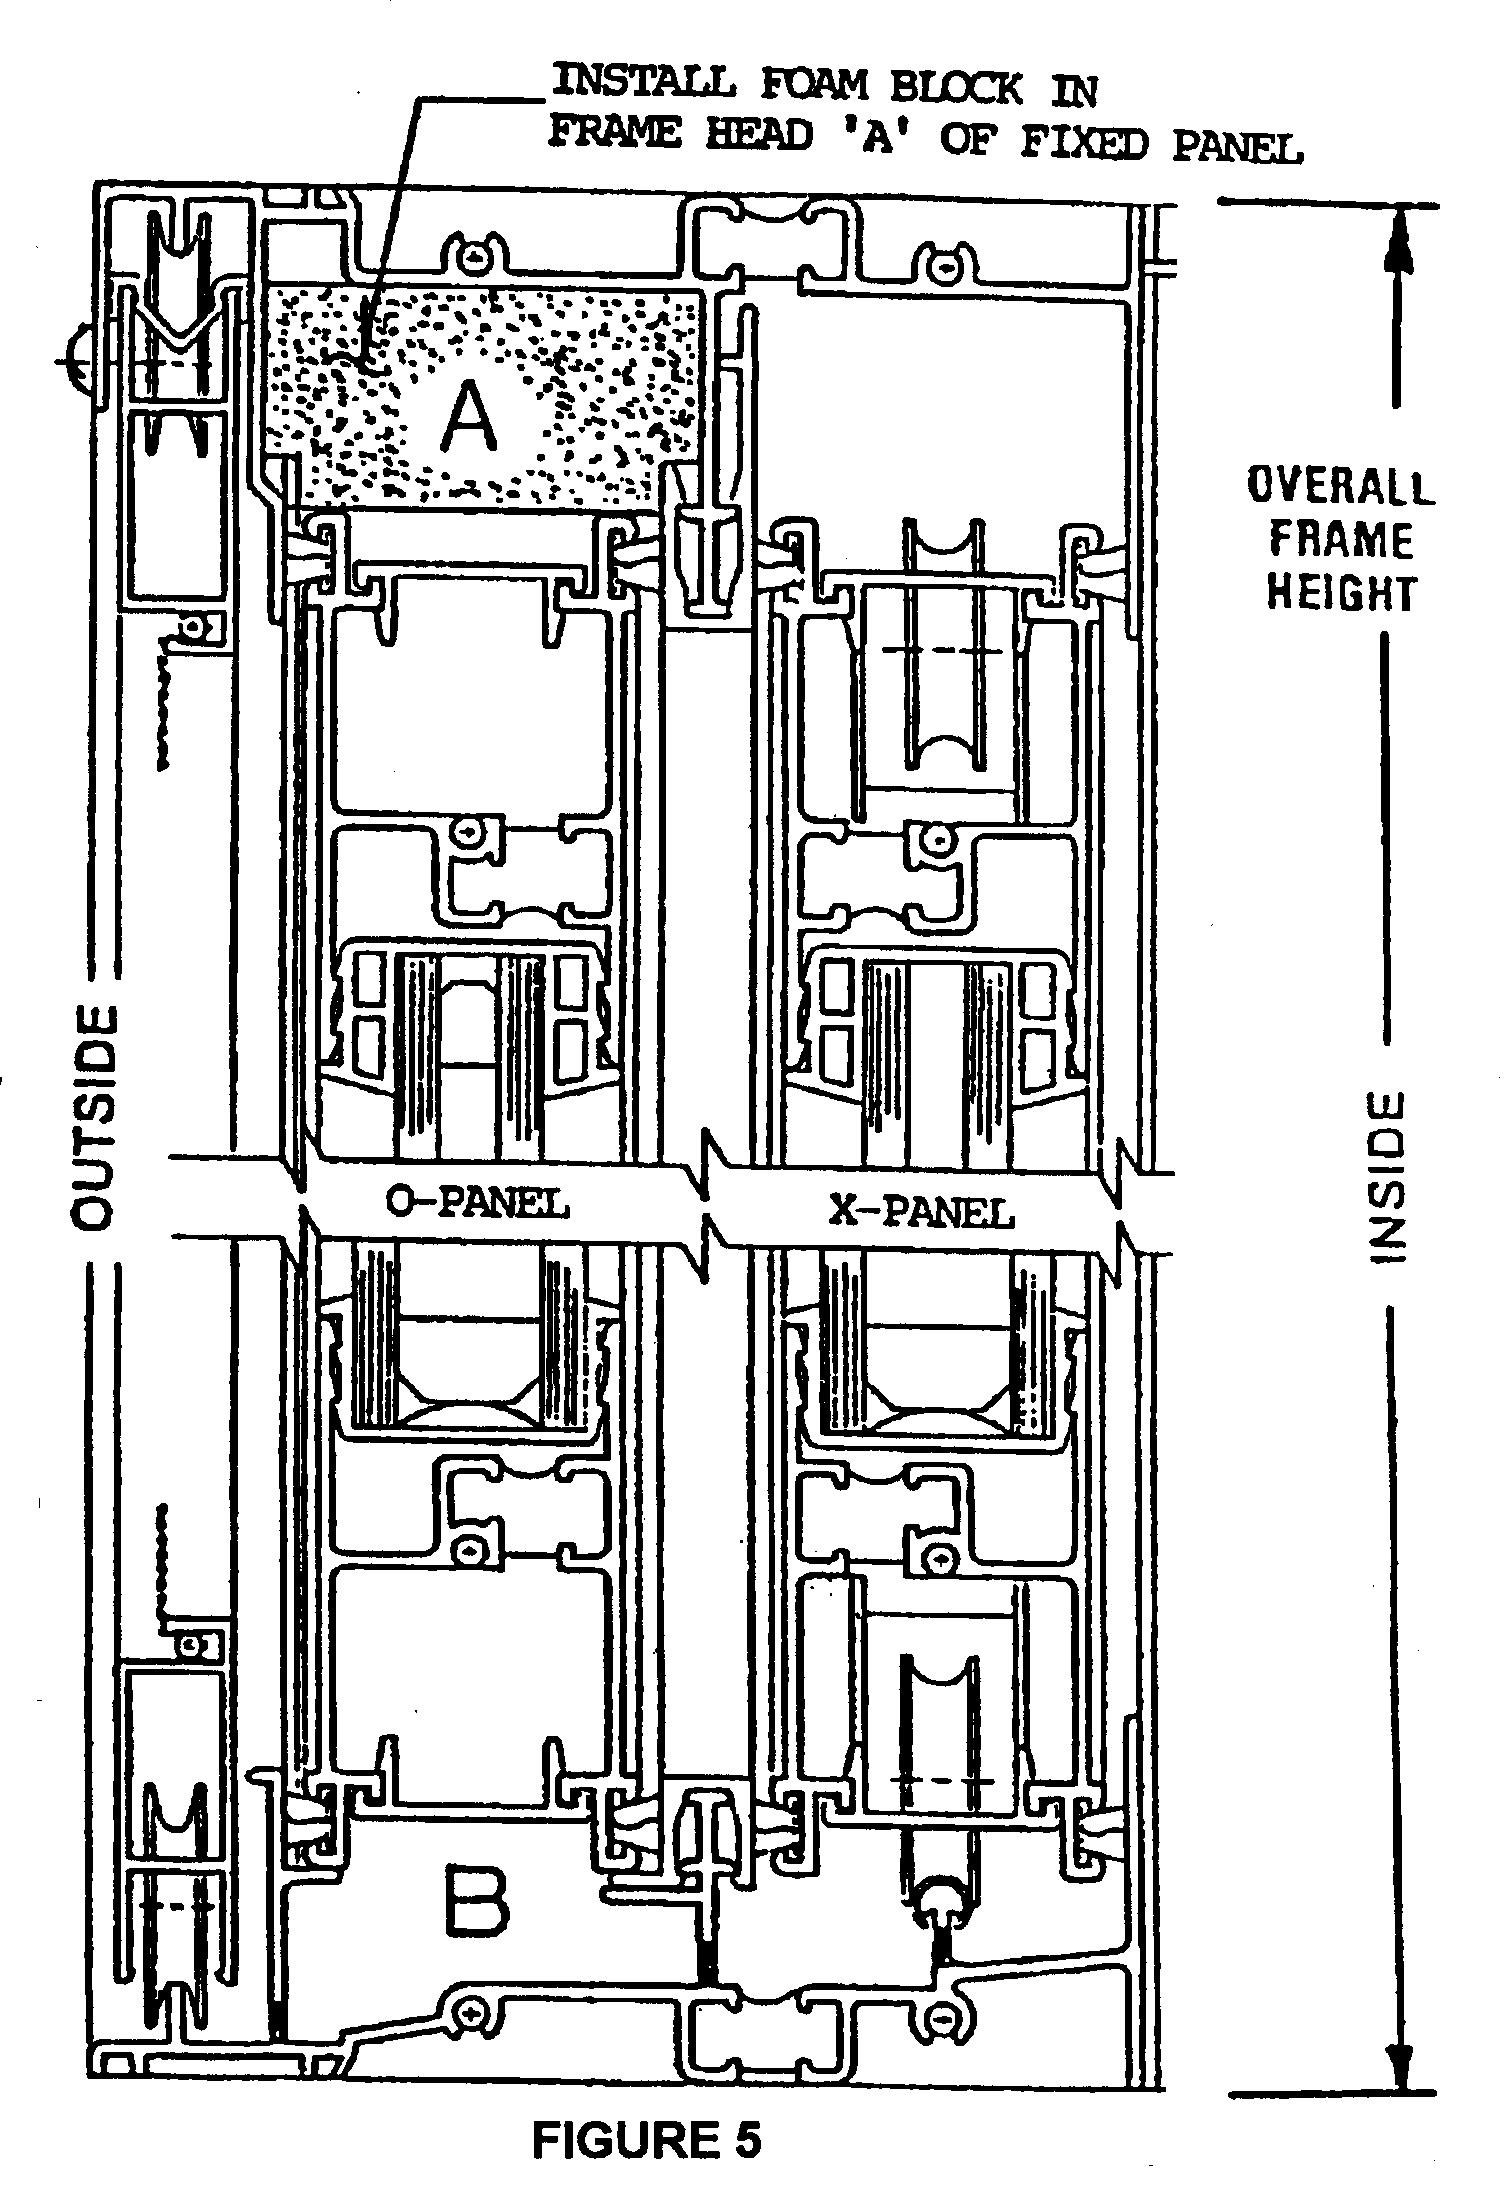
- Install fixed panel first by inserting top of panel into slot of frame head “A”, lifting it over inside ledge of sill and into outside sill slot.
- (See Fig. 5). Now, slide into slot of frame jamb. Set plumb and then fasten to jamb with two clips (from inside of house) using frame installation screws. See Fig. 7 at “D”.
- Install moving panel similarly, placing wheels on rail. Adjust this panel to align it with frame and interlock by raising or lowering (either or both) tandem wheel assemblies turning screw at “B” (Fig. 6).
- Install threshold sill cover between frame jamb and fixed panel by inserting into fixed panel track (Fig. 4).
- Slide vinyl seals in interlock edge of fixed panel O to extreme top and bottom of panel and tighten screw in each seal.
How to adjust and Reverse active Door (See Fig. 6)
Doors are shipped with two sets of wheels at the bottom and top of active door opening on the right side-facing door from inside. 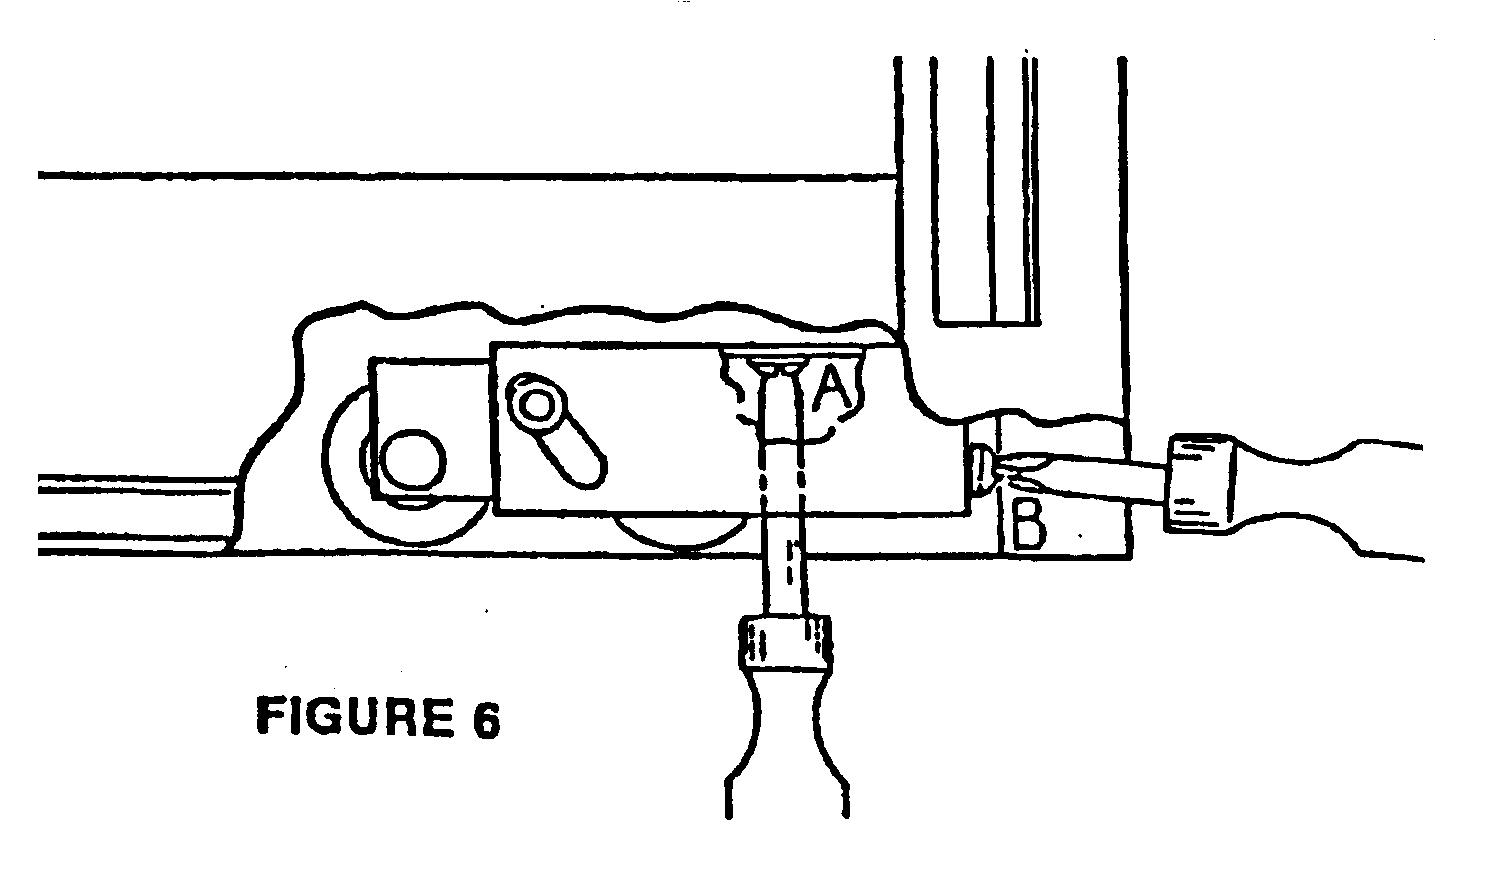 To reverse active door, rotate 180 degrees.
- To remove wheel assembly remove screw at “A”.
- Wheel assemblies may be adjusted by turning screw at ” B” clockwise to lower panel.
Hardware
Install Latch set in active panel using screws provided. If key cylinder is used, remove knockout plug and insert cylinder.
Moving Left to open as shown in Fig. 7:
- Install fixed panel “A” and active panel “B” as described in 2-panel installation.
- Fasten intermediate jamb “F” to panel “C” using three #6 x ½” screws. Note: Sill end of intermediate jamb is notched.
- To install panel “B” opposite to that shown in Fig. 7, follow step 2 and fasten intermediate jamb “F” to panel “A”.
- Install threshold sill cover between fixed panel “A” and frame jamb (length should be approximately equal to width of one panel.)
Caution: Place wide slot “A” (Fig. 4) facing inside of house.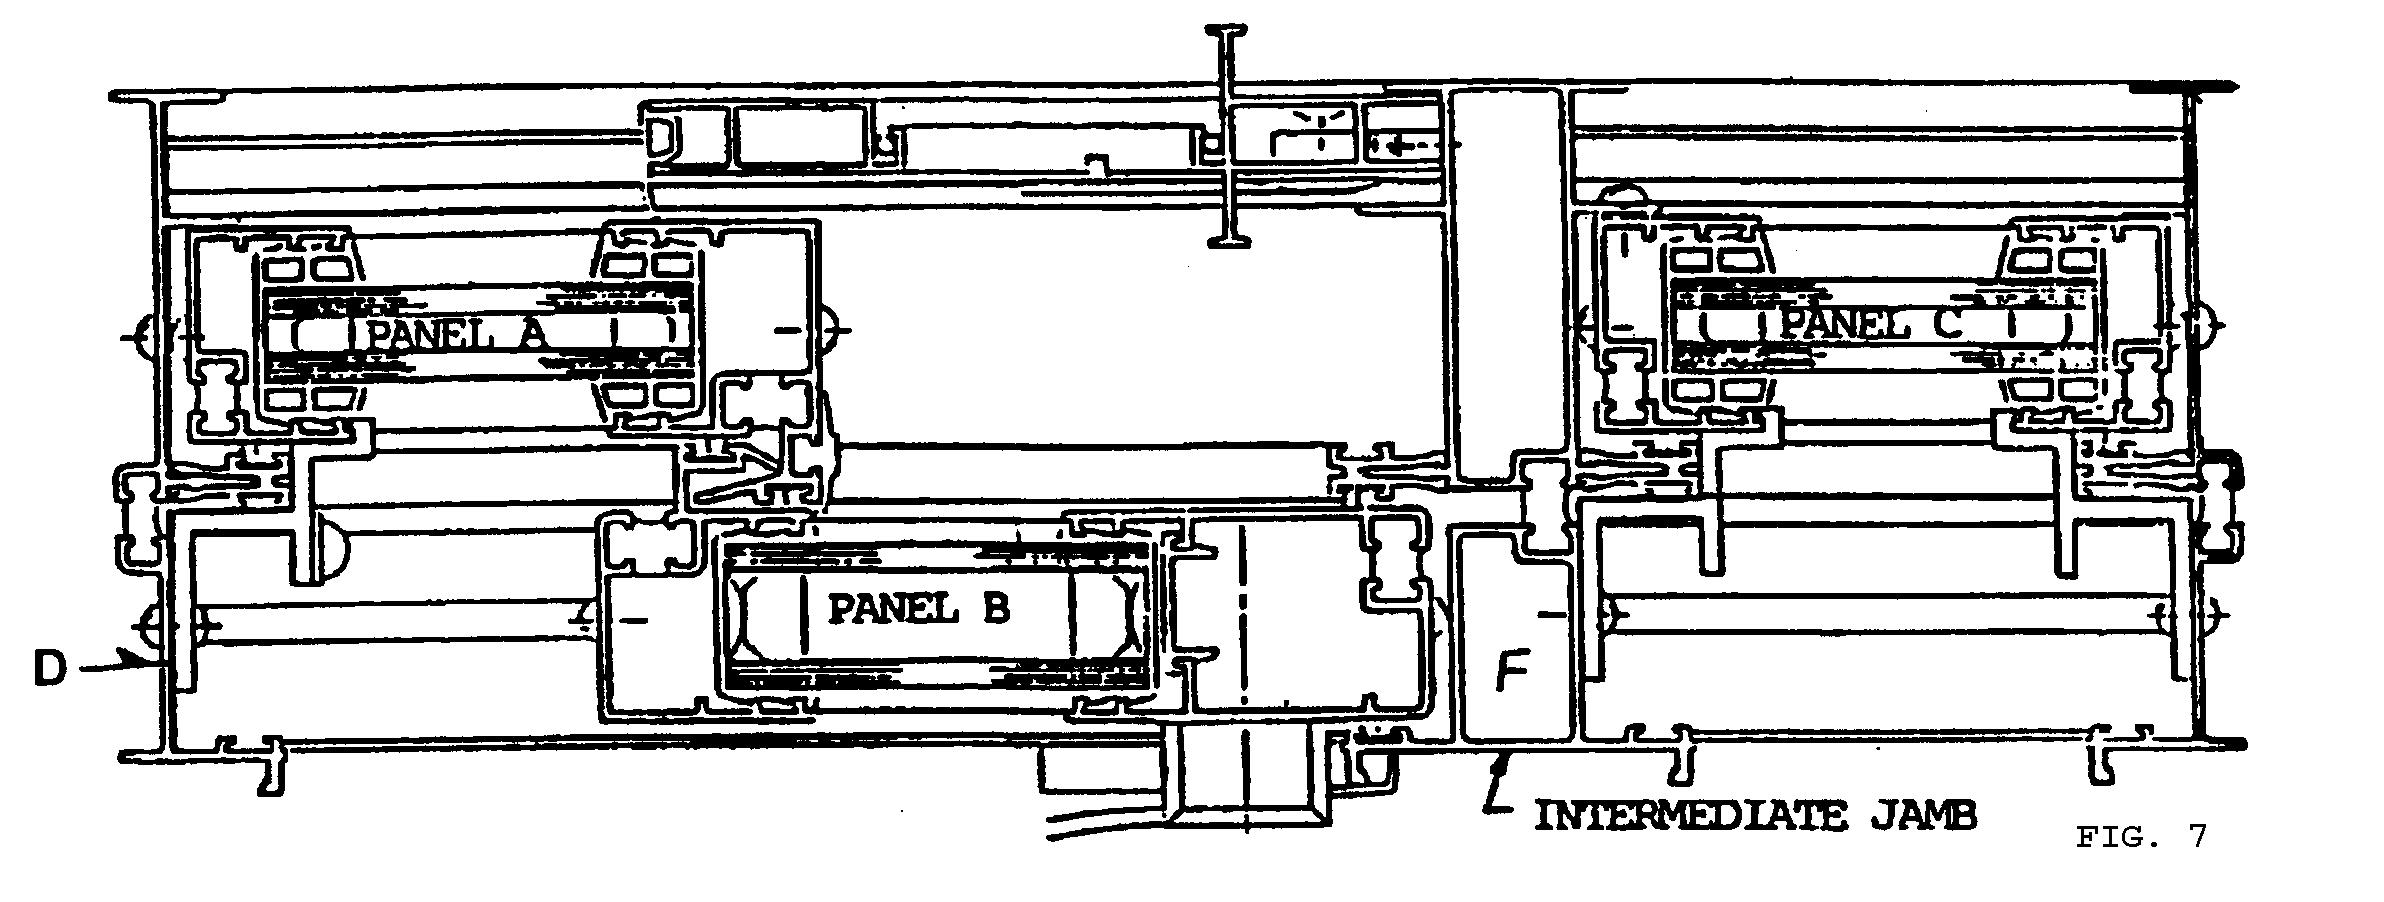
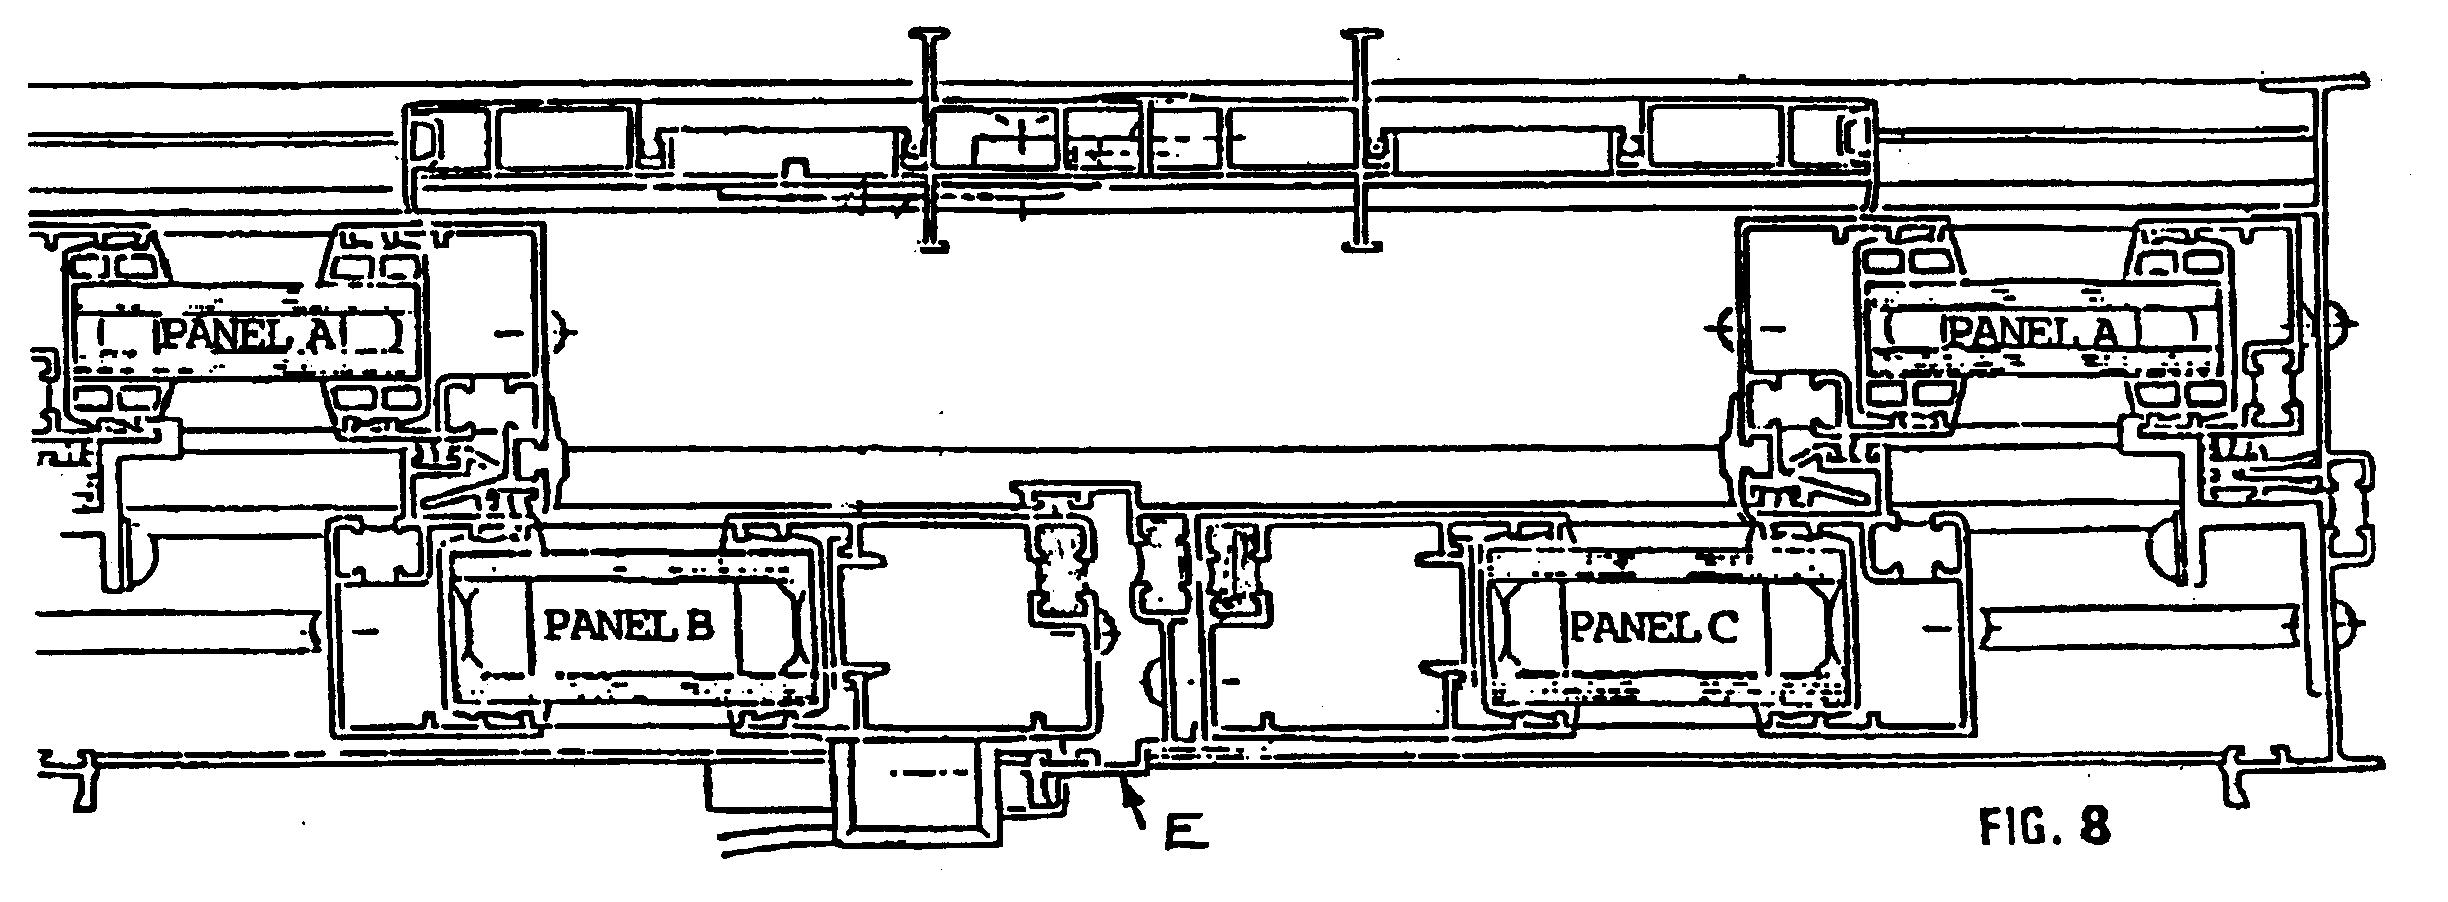
- Install fixed panel “A” and active panel “B” and “C” as described in 2-panel door installation instruction.
- Fasten astragal “E” to panel “C” using three #8 x ¾” screws. Note: Sill end of astragal is notched.
- Install inactive latch set to panel “C” as shown.
- Install threshold sill cover between fixed panels “A” (Fig. 8).
Caution: Place wide slot “A” (Fig. 4) facing inside of house.

- Screen Placement: With wheels retracted, place top of screen into top guide and lift bottom onto bottom track.
- Adjusting Top and Bottom Roller Screws: Use Phillips screwdriver to adjust roller tension.
Variations for Different Models
- 2-Panel: Install screen door as shown above. Fasten keeper to jamb with 2 screws provided.
- 3-Panel: (Active Center): Install screen door as show. Fasten keeper to intermediate jamb “F” with screws provided. (See Fig. 7)
- 4-Panel: Install screen doors as shown above. Fasten keeper to screen astragal of OXXO screen door with screws provided. (See Fig. 8)